BaseCamp is a free software for the planning of outdoor activities, owned by Garmin. At first glance, it might seem to be an application for the exclusive use of the brand’s users, but that is not entirely the case. The possibility of exporting tracks in GPX and KML formats allows for a more universal use.
Once the software is downloaded from the official Garmin website and installed on the computer, you must load the maps you are going to work on, whether they are the brand’s own or external vector maps. You simply need to search the web for the maps that interest you (free or paid) and install them on your PC.
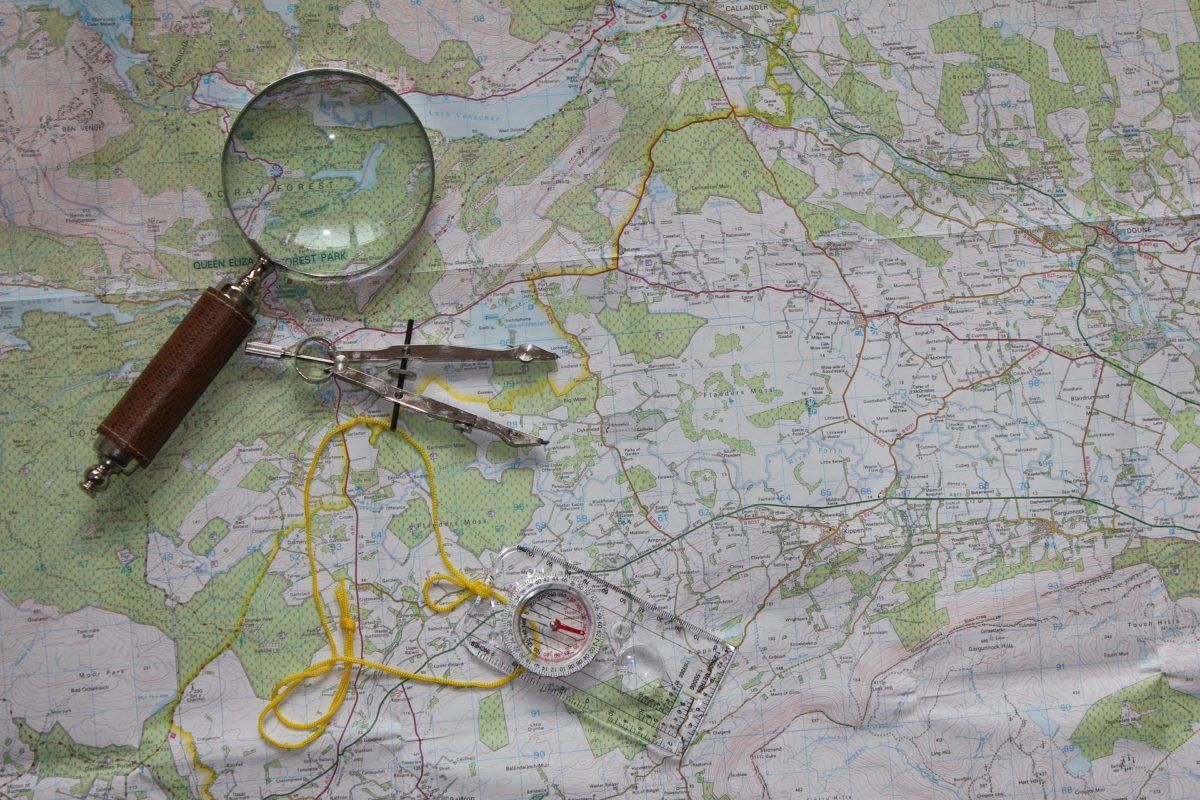
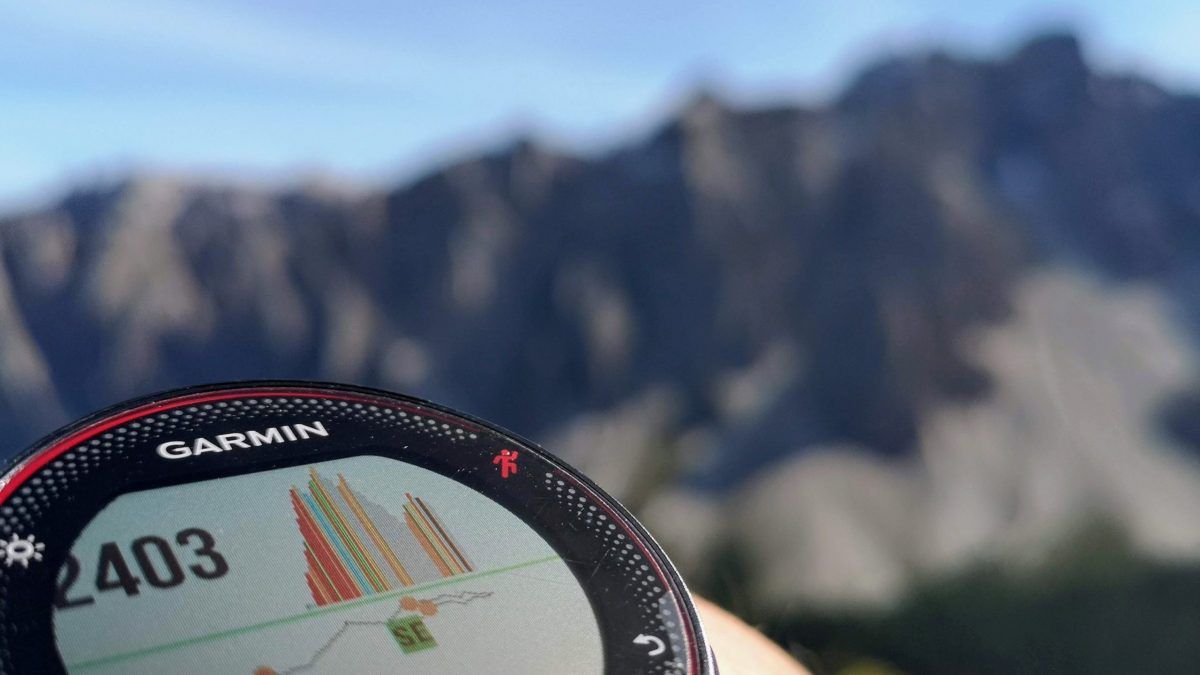
On this occasion, we are going to show how we create the tracks for our traverses section, in order to digitalize those routes carried out years ago, or simply those for which we have not recorded the tracks. Despite having the technology, until the creation of TreckView, we usually navigated the old-fashioned way: using maps, a compass, and until very recently, an analog barometric altimeter from the 90s. The GPS was used only to mark the car’s location and some reference Waypoints, just in case the fog played its part.
WHY CREATE OR MODIFY TRACKS?
With the arrival of new technologies, navigation methods have modernized. Devices are increasingly affordable and today there are many people recording and sharing itineraries.
It is very likely that we will find the route we want to follow online, ready to be loaded into our GPS. When the track fully coincides with our activity, the planning task becomes lighter.
Sometimes it happens that the itinerary we want to perform does not correspond to the track we have downloaded, and we must make adjustments to adapt it to our needs.
It may happen that the track has not been processed by its creator and we find deviations in the course. These may be due to wrong paths, detours to take photographs, etc. This is not serious for navigation if we consider the complete route, but a clean track reduces uncertainty on the ground.
It can also happen that we cannot find a downloadable track for our itinerary, so creating one at home is a good option. Of course, this is provided we have high-quality calibrated maps and wish to have a reference for “in itinere” orientation. For this purpose, as mentioned at the beginning of the post, we will use BaseCamp, not because there aren’t other quality alternatives, far from it. Simply because it is the tool we are familiar with, and its learning curve is relatively low.
CREATING A TRACK WITH BASECAMP FROM SCRATCH
Before creating the track, we must be clear about which points of interest or Waypoints we will insert, so that our navigation is as complete and safe as possible. Origin and destination, water supply points, shelters and huts, bivouacs, junctions, mountain passes, anchors, key steps, or even a nearby peak that helps us locate ourselves physically on the terrain… in essence, any element that proves useful.
Once the Waypoints are identified, we move on to placing them on the map.
INTRODUCING WAYPOINTS
USING THE INTEGRATED SEARCH ENGINE IN BASECAMP
In the upper right part of BaseCamp, we find a search box similar to the one we can find on any website or App that has a search engine. Generally speaking, it is the fastest method to find what we are looking for.
A couple of things must be taken into account. The first is that this search engine cares a lot about spelling mistakes, so the absence of a simple accent will result in an unsuccessful search. The second is that it uses the names stored in its own library; that is, if we try to locate the “Refugio de Marcadau” and in its library it appears as “Refugio de Wallon,” we will not get any results.
To make the task easier, we recommend searching by generic names. For example, when entering “Viadós,” the map returns three possibilities: “Señal de Viadós,” “Refugio de Viadós,” or “Bordas de Viadós.”
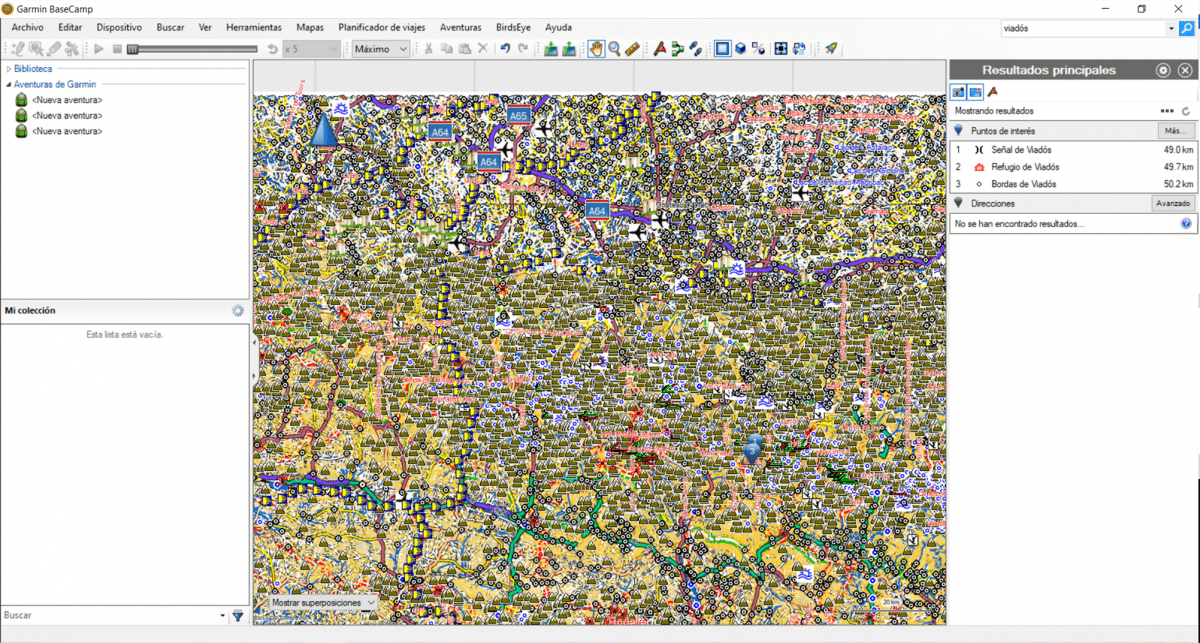
We double-click on the desired option and the system places us over the objective. In turn, BaseCamp opens a window that shows us a series of options regarding it. One of them is shown as a flag. By clicking on it, we are indicating that we want the selected point to become a Waypoint. Each time we mark a Waypoint, it will appear listed in the left column, in the section called “My Collection.”
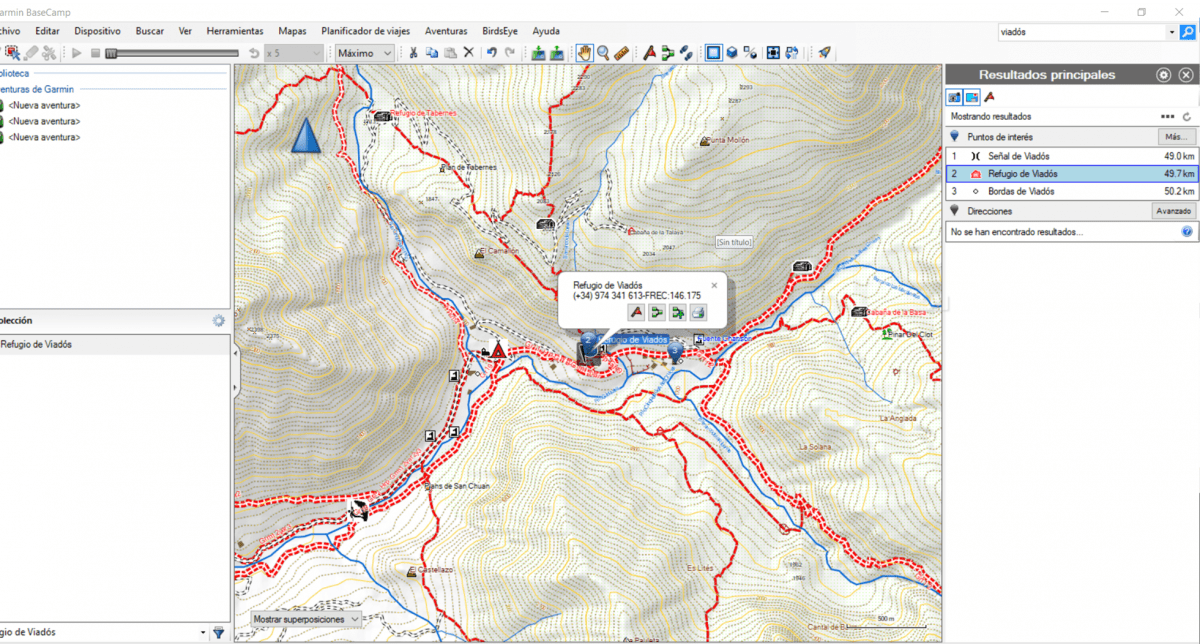
ACTIVATING THE WAYPOINT MARKING FUNCTION IN THE TOOLBAR.
Simply put, there are names that are not indexed on the map or that do not appear as we colloquially know them. In this case, we must locate the point manually. If we know the point of origin and the destination, we just have to follow the route until we find what we want to locate.
Once the point of interest is found, we must get as close to it as possible using the zoom (mouse wheel). From this position, we go to the toolbar and click on the flag. We see that the button activates. This is important because, until we press the button again, every click we make on the screen will be considered a reference point. This is why we choose to get as close as possible; the possibility of clicking outside the point is reduced.
When we finish marking the desired point or points, we press the flag button again and that’s it.
MODIFYING WAYPOINT DATA
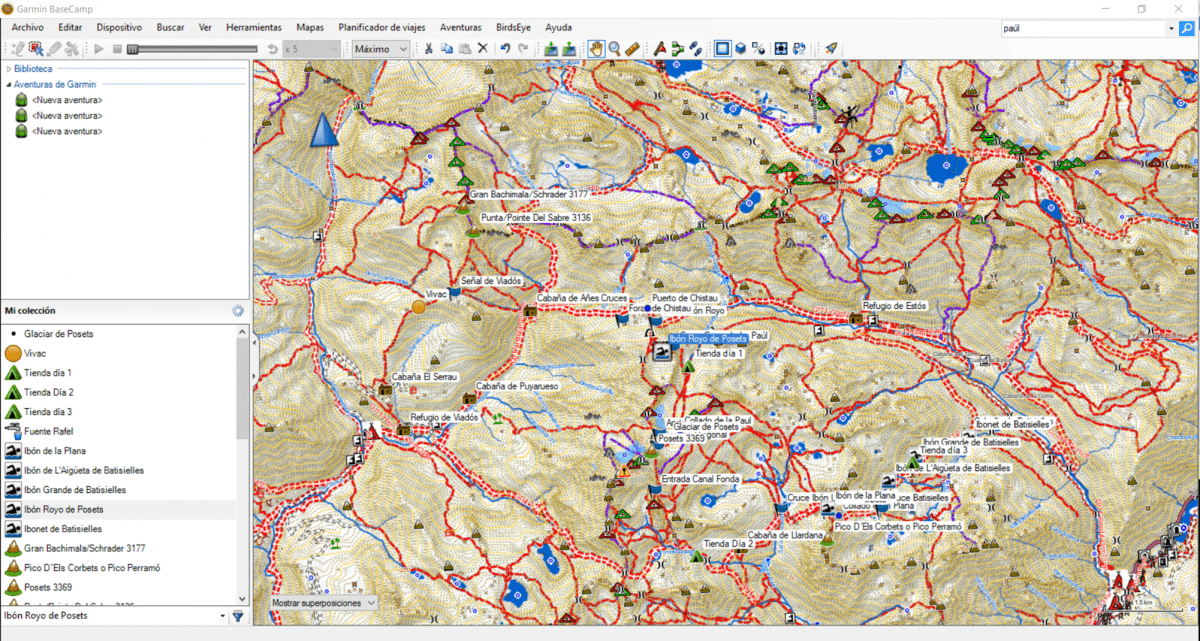
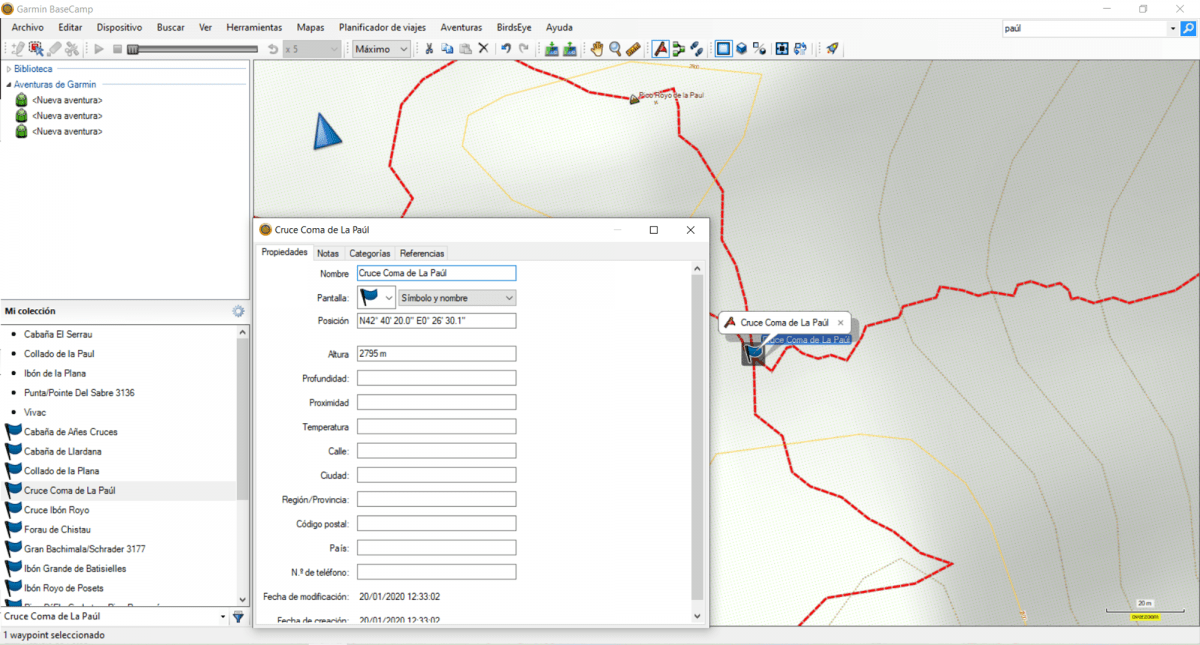
Now that we have the list of Waypoints in the “My Collection” section, we can modify the values of each one to adapt them to our tastes and needs.
This can involve modifying the names that the system gives by default, in order to favor “in situ” navigation. Replacing the name “Bivouac” with “Ibones Azules Bivouac” already provides us with valuable information.
The same applies to icons; from a flag or a simple point, we can set the related icon that we like best, such as the image of a summit instead of a flag, or a hut to mark shelters. BaseCamp does not offer a huge variety of icons, but it’s better than nothing. It should be noted that the icons will be valid while the track is on the PC, so they will not be transferred to the device. Even so, when creating the track, we can intuit at a glance the elements that we are going to include in the itinerary.
To modify the data of the points of interest, simply click on the Waypoint to be modified in “My Collection.”
ELIMINATING WAYPOINTS
Deleting a point of interest that we have introduced by mistake or simply decided not to include in the track is simple. Select the Waypoint in the “My Collection” section and, by right-clicking, select the “Delete” option in the menu.
RECORDING THE ITINERARY
For this section, we would have liked the system itself, after having previously selected the paths to travel, to create the track for us, but that will not be the case, at least for now. We build the path by tracing it with the mouse. The positive side is that we make the decisions on the course to follow; the negative, of course, has to do with the time required for its preparation and, naturally, the precision with which we are able to work.
In this context, seeking a balance between precision and execution speed is a good way to optimize our resources. On obvious paths like GR or HRP, we don’t need as much precision for navigation as on the path of the Midi d’Ossau chimneys. That said, when working on the route, we will use the keyboard arrows to move the view on the map and the mouse wheel to adjust the zoom level.
The higher the zoom level, the more precise the traced route will be and the more time its execution will take. At a lower zoom level, we will achieve higher work speed as well as a better perspective on the map, but at the cost of sacrificing precision. We usually move one or two mouse wheel clicks away from the maximum to find a balance between the three parameters, and we vary the magnification according to our needs. During the process, it is recommended to zoom out enough to check that we are on the right track. Anticipating the error takes less time than correcting it.
ADDING A NEW TRACK OR A NEW SECTION TO THE ITINERARY
There is something we haven’t talked about, and that is that the creation of the final track can be done all at once or by sections that we will join later. Imagine for a moment that using the track for the ascent to Picos del Infierno from our website, we wish to access the Upper Blue Lake via the GR11 instead of following the proposed path, which flanks the ridge that separates them.
We can create a new track starting from the point where we take the detour until we coincide with the itinerary on the GR11 again. Once created, we divide the main track at the intersection points and paste the newly created one. We delete the section we are not interested in, and the new track is ready.
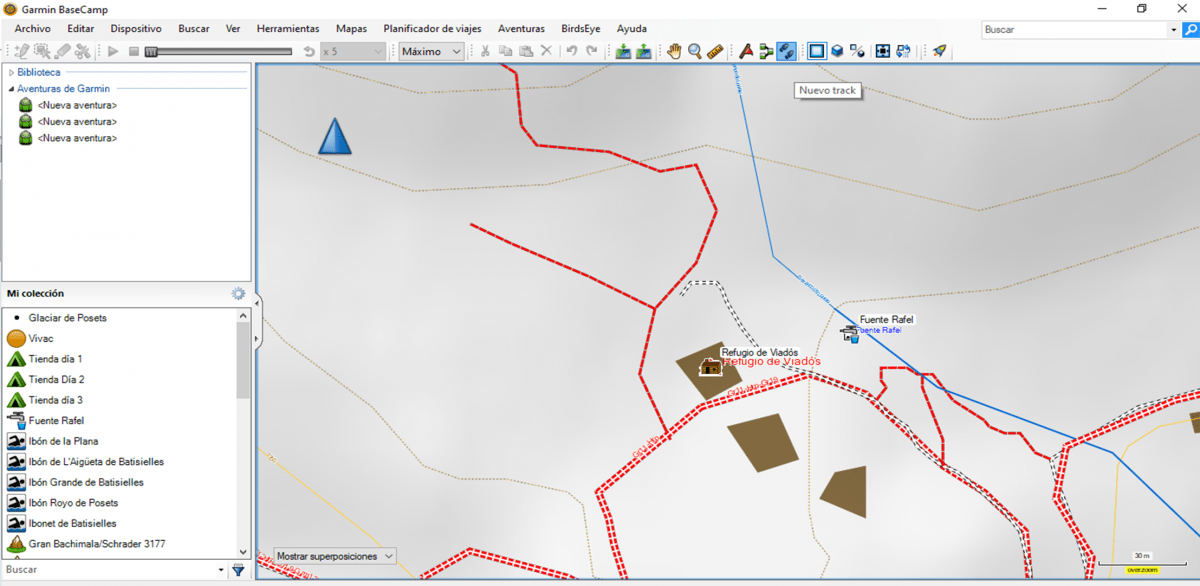
Select the icon represented by two shoe soles in the toolbar. If you hover the mouse over the icon, an information tag will appear indicating its function, in this case “New Track.” The pointer changes and takes the shape of a pencil. Move the cursor to the starting point and click. From here, with the left button pressed, we “record” the track while moving the cursor along the path.
If you release the left button, the track stops recording but remains in editing mode from the last recorded point. This is an especially useful function because it allows us to modify the map position (keyboard arrows) as we advance or even vary the zoom level (mouse wheel). So once those parameters are readjusted, we can continue exactly from where we left off.
By clicking on the footprints icon again, BaseCamp interprets that we have finished recording the track. Of course, you can always access it from the “My Collection” section to make modifications.
EXAMPLE: ADDING A NEW SECTION
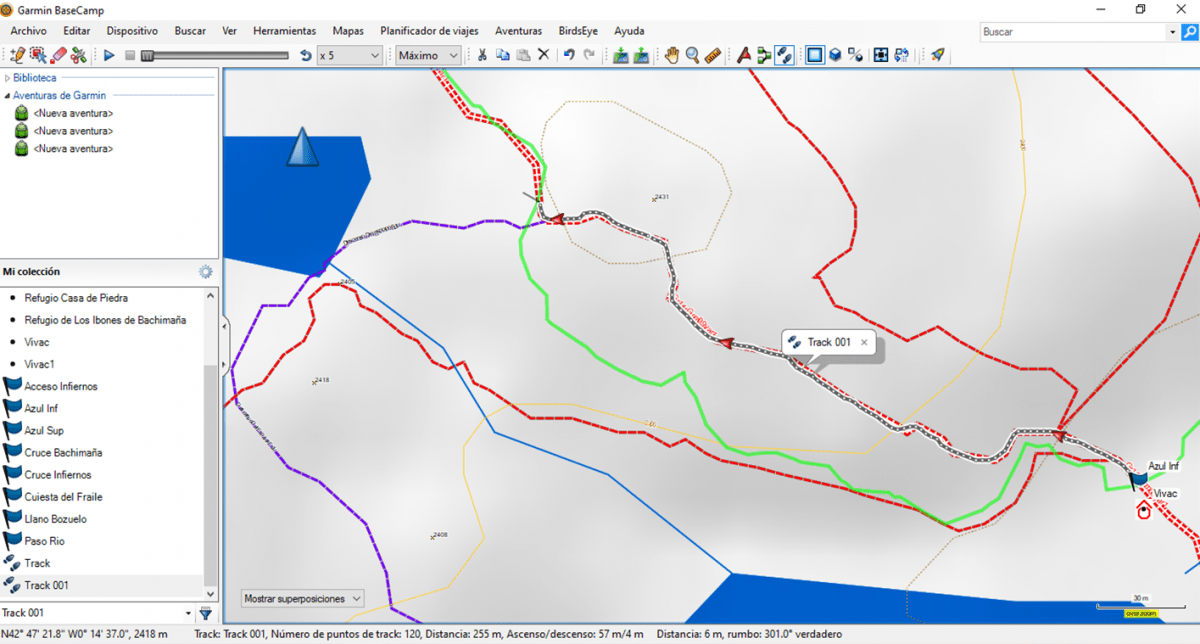
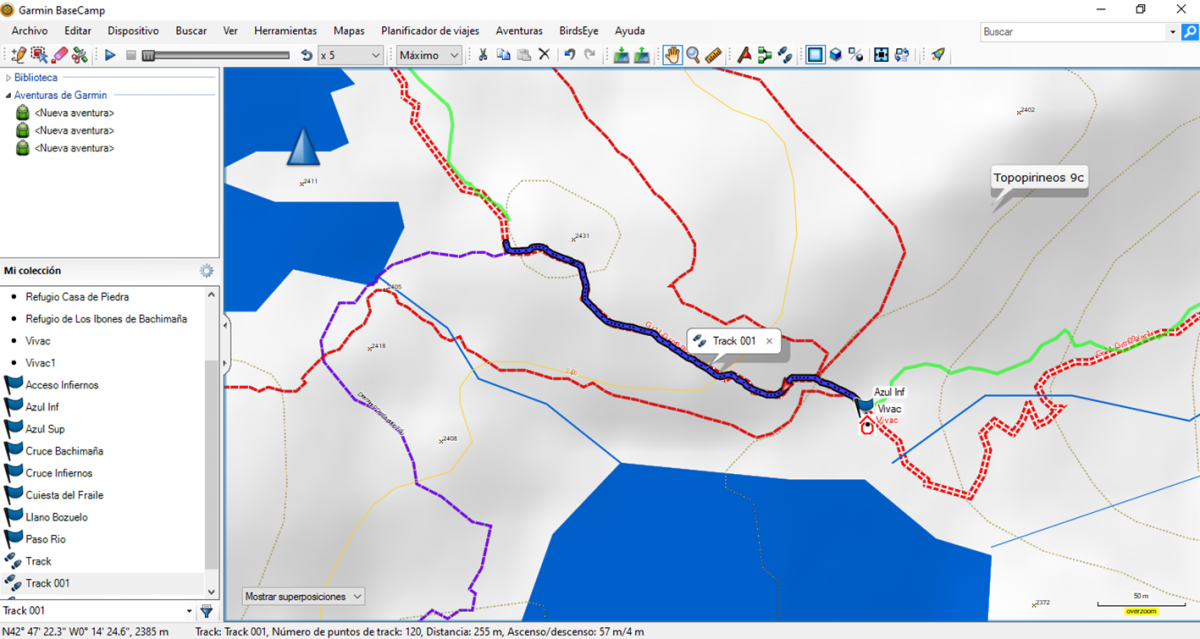
The first image in the carousel corresponds to the creation of the new section. In the second image, we have cut the initial track (shown in green) and removed the segment that passes through the river mouth path. We conclude with the final photograph, which represents the final merge (the new modified track shown in blue).
MODIFYING THE TRACK
It is only logical that from time to time the mouse escapes us and we end up with part of the trace off-path, or with a point slightly out of sync with the trail. Fortunately, BaseCamp accounts for this and provides a set of functions to make the task easier.
However, the direct access to these functions is usually hidden by BaseCamp by default, so the first thing we must do is activate their display in the toolbar. Click on the “View” menu and, in the section called “Toolbars,” activate the utility functions:
INSERT
Using this function, we can insert a segment between two consecutive points on the map. This is especially useful, for example, if we have traced a route that passes through a mountain pass and we forgot to include a summit. It should be noted that if we do not complete the path all at once and finish next to the destination point, the system will not record it.
MOVE
Moving a stray point is not a problem, as this function allows us to move only the point we select to literally drag it wherever we want. Very useful for when the mouse has slipped during the track recording. Its use is also recommended to correct GPS “drifts” in areas with poor coverage, such as forests or canyons, whether in our own tracks or those downloaded from the internet.
ERASE
We use it to clean up routes we have created on the ground. For example, to eliminate points where we have turned back.
You can delete points individually or in series if you drag the mouse with the left button pressed.
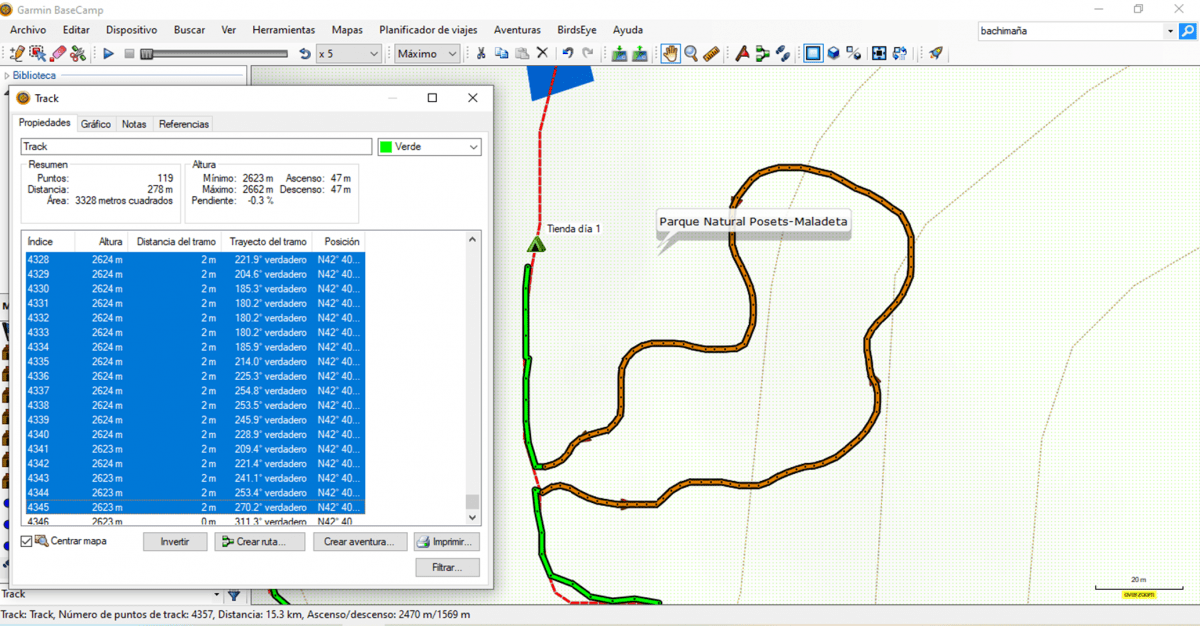
If you want to delete a large section, it is preferable to double-click on the route and proceed with the deletion from there. The procedure is simple: by double-clicking the track, a summary box of the itinerary opens, listing all the points that compose it. With the box open, click on one of the points in the section to be deleted to activate it. You will know the point is active because it appears framed by an orange circle on the map. In turn, if you click in the summary window, it will appear selected in blue.
ERASING EXAMPLE
The advantage of working on large sections in the window is that we can move through the points in the list using the keyboard arrows while seeing the exact position of each one on the map.
For example, suppose the range of points we need to delete is between positions 4227 and 4345 (in the left column of the summary box called “Index“). We click on the first point and move down with the arrow key while holding the Shift key, or by selecting point 4227 and then clicking on 4345 while holding Shift. Then, simply press the “Del” key on the keyboard or right-click to select the “Delete” option. BaseCamp will delete the selected section and automatically stitch the previous and subsequent points to maintain the track’s continuity.
CUT
Having a track that goes beyond our objective doesn’t make much sense. Especially if we are going to use our GPS device for navigation, as we will be able to interpret at a glance how much we have left to arrive without having to resort to a specific Waypoint.
For these matters, there is no great mystery. We activate the scissors icon and click on the point that will mark the end of our route (or the intersection point in a major track modification). BaseCamp will divide the track into two parts and consider them two independent units. We delete the track we don’t want and keep the one we are going to use.
COMBINING TRACKS IN BASECAMP
This is possibly one of the most interesting functions of BaseCamp for creating new itineraries. We can use a track downloaded from the web and make a modification to extend it or vary its course from a certain point.
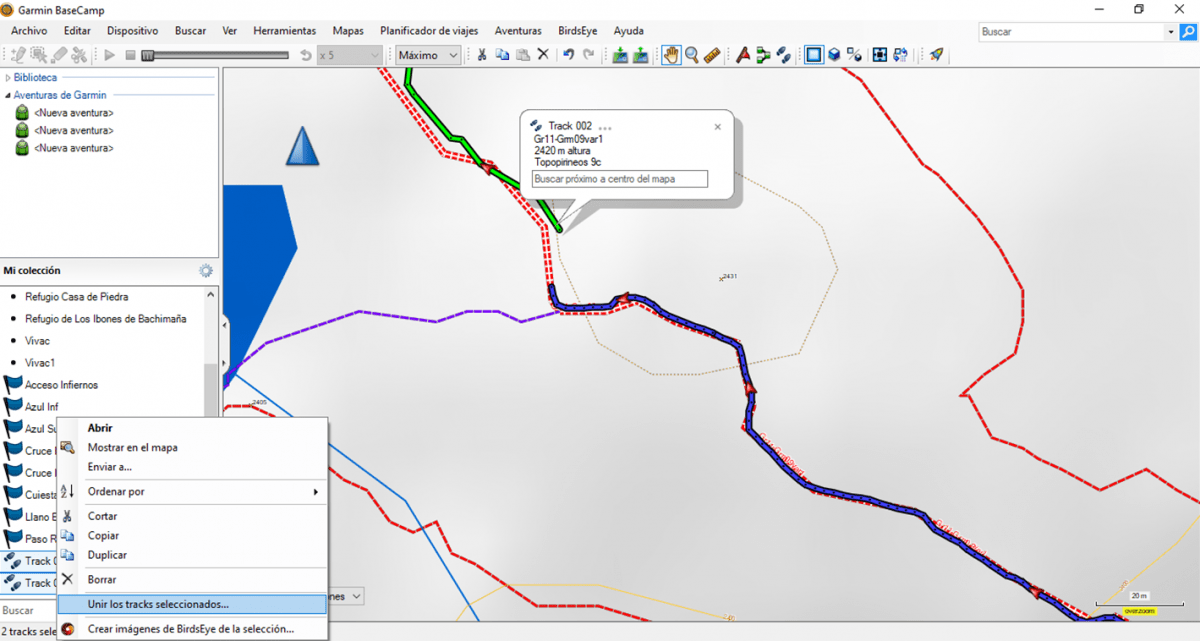
For example, in our traverses section, we can combine the itineraries that make up Les Gaves de Cauterets (Les Gaves de Cauterets 1 and 2). If we cut the track that goes down from the Marcadau valley shortly before Pont d’Espagne and add the transition section until it coincides with the itinerary that goes up towards Gaube, we only need to delete the section from the parking lot to the intersection of the two tracks. Once the modifications are made, we must select the two tracks (in the order of travel) and combine them by right-clicking and selecting the corresponding option in the menu.
BaseCamp will ask if, in addition to the newly created combined track, we want to keep the tracks that compose it in the “My Collection” section. For security, it is better to keep them until verifying that the new track maintains the correct travel order and that there were no problems during the pasting. Once verified, we can delete them from BaseCamp.
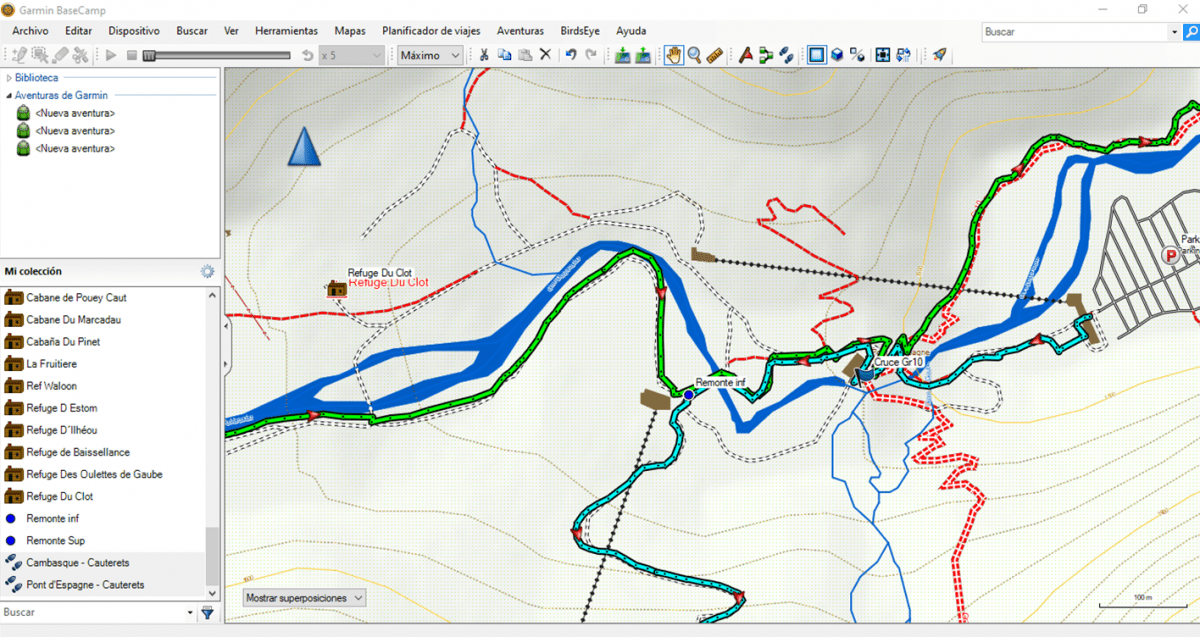
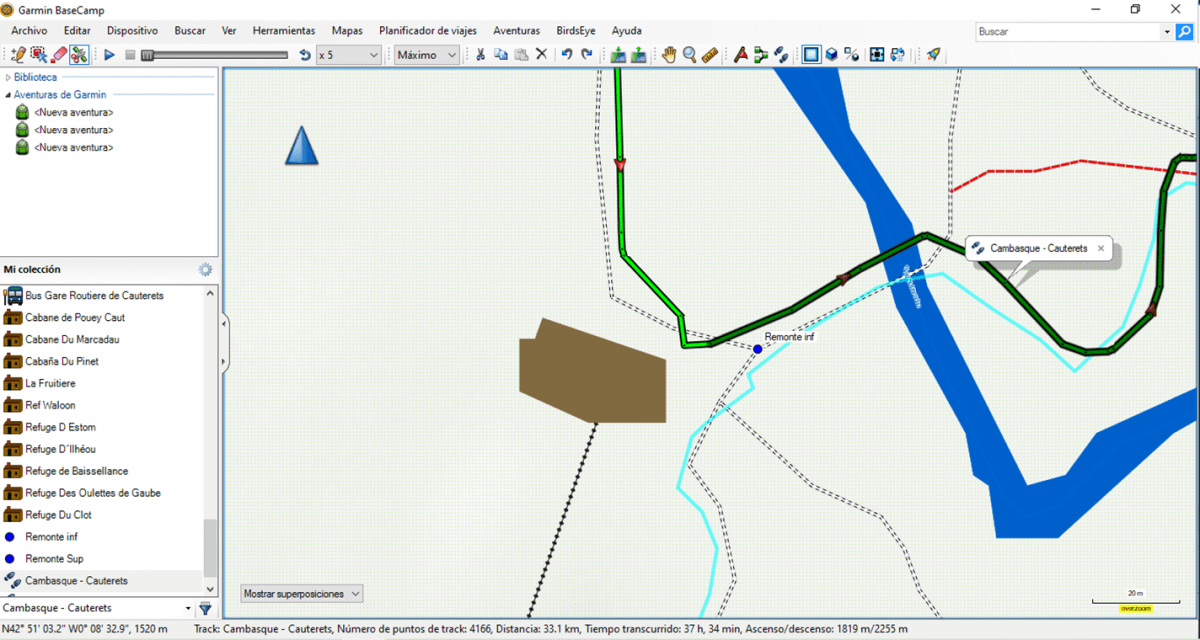
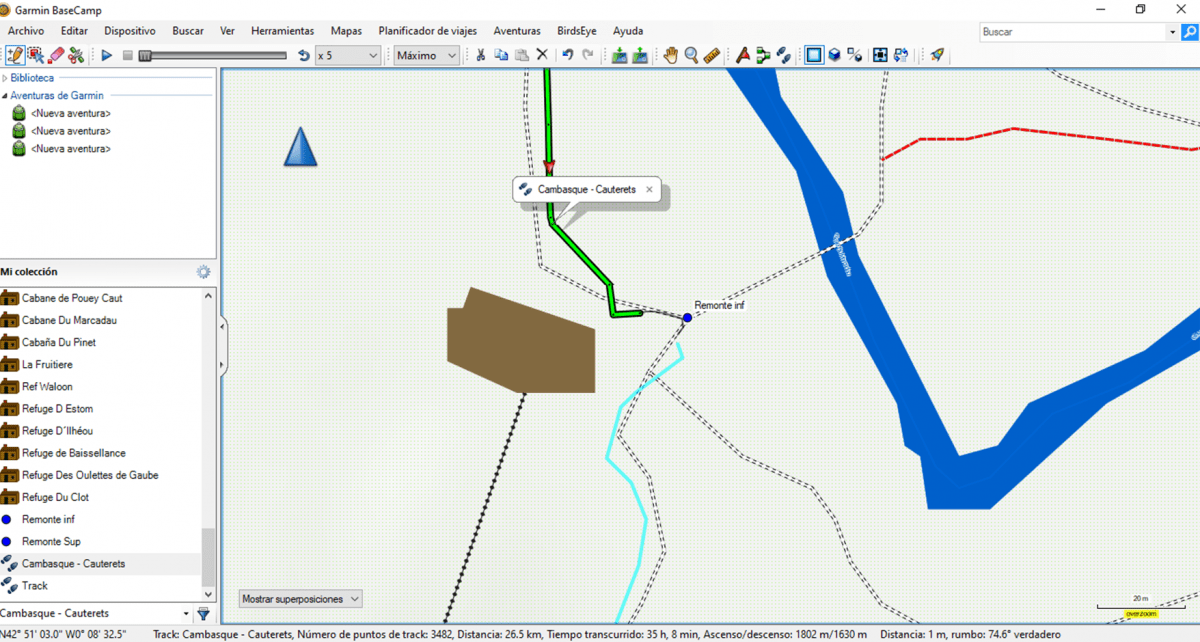
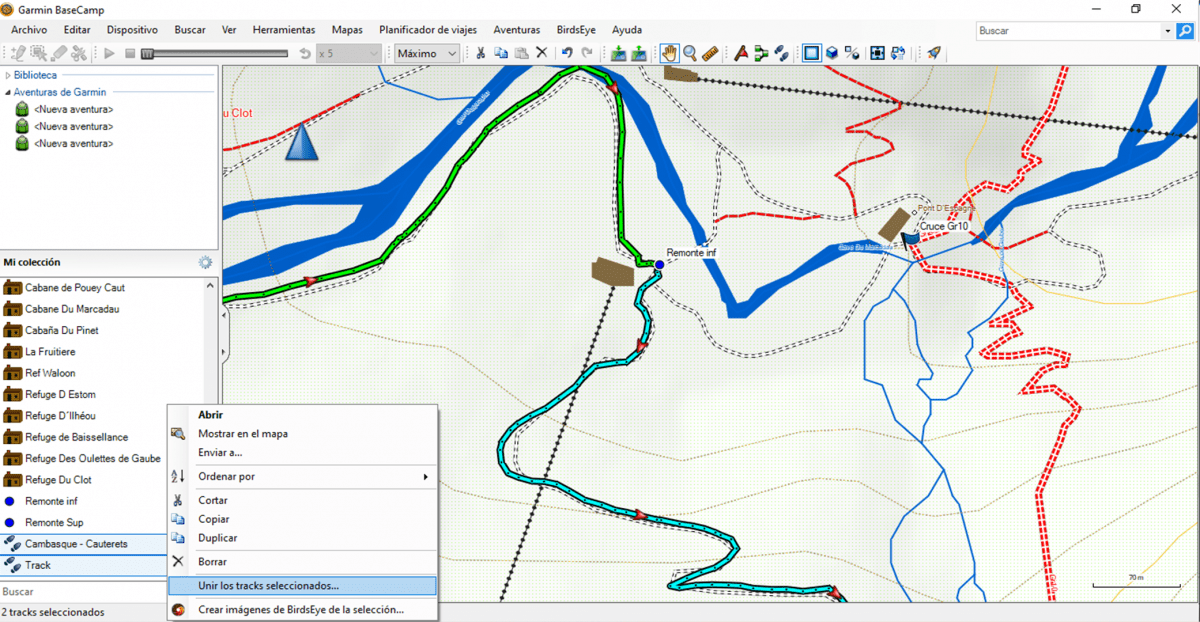
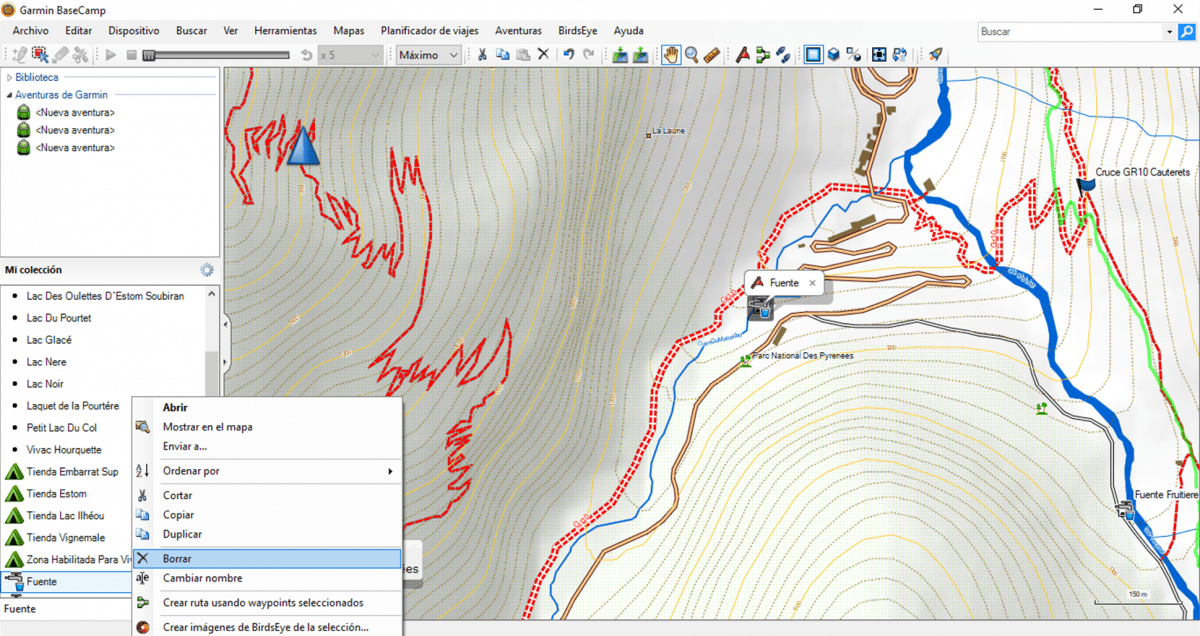
In the sequence, we can see the following steps:
- Selection of the tracks to estimate the junction point between both routes.
- Cutting process to eliminate the excess section of the first track. (The same must be done with the second).
- Inclusion of a new section to bring the first track closer to the second.
- Joining of the two tracks in the order of travel.
- Elimination of the excess sections and Waypoints.
EXPORTING TRACKS FROM BASECAMP
By this stage, in “My Collection,” we should have a list of Waypoints along with the track we have created, ready to be exported.
There are two export modes for the items in the collection list. In the first one, we can export by creating a file with each item we select separately (clicking on each one while holding Ctrl) or, conversely, exporting the entire collection as a whole. For convenience, our recommendation is to delete everything from the collection that you do not wish to include in the track before exporting. This way, we can verify on the map that there is no Waypoint that does not belong to the itinerary we are going to follow, in order to avoid confusion during navigation.
EXPORT TO PC
BaseCamp offers several file export possibilities; this fact allows the program to be used beyond the brand’s own devices. Of all the possibilities offered, the most interesting are exports to GPX and KML formats.
With the former, we can use the track we have created with almost any GPS device. The latter gives us the possibility to insert the itinerary into Google Earth.
The procedure is simple: Click on the “File” menu and select the export option. Depending on whether we have selected all the items in “My Collection” or just part of it, choose the corresponding option. The system opens a window where we can indicate the location where we will store the new file and the format in which we will do so.
SEND TO GARMIN DEVICE
In the case of having a Garmin navigation device, we have the possibility of sending the route directly to the device. In this case, instead of accessing “File” in the menu, we must go to “Device” through the “Send to Device” function.
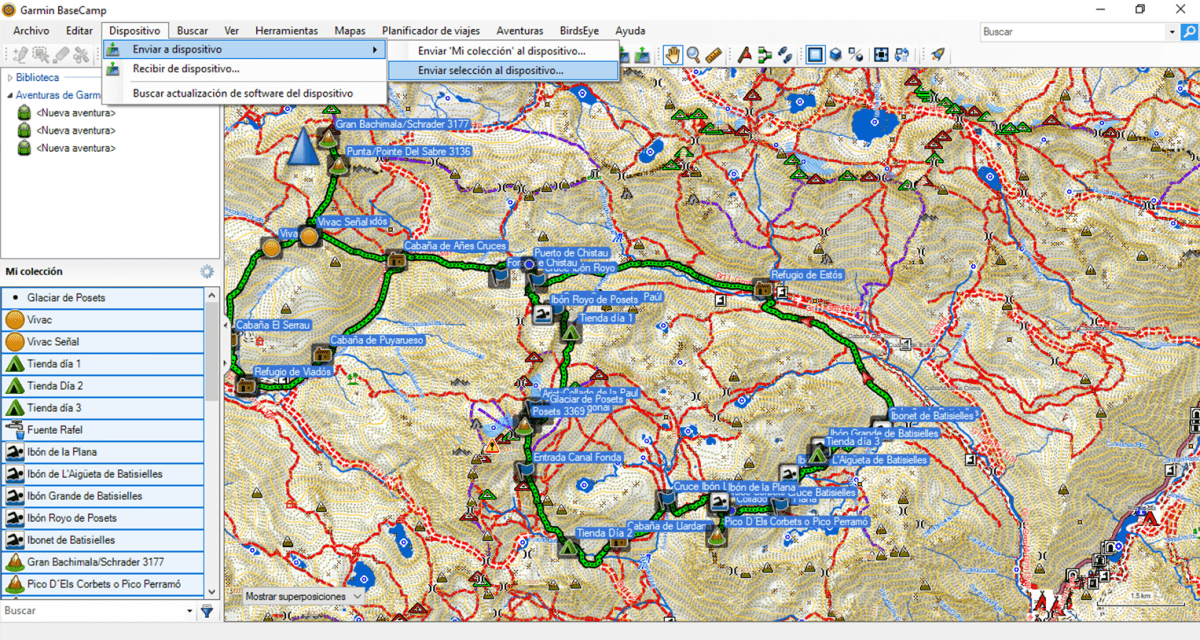
Now that you know how to create your own routes in BaseCamp, all that is left is the most important part: plan the route well, prepare your backpack… and enjoy!